A cosplay tutorial for how to make Link's Zonai Arm as featured in Tears of the Kingdom! This tutorial teaches you how to glue silicone to fabric in order to make a stretchy cosplay glove featuring silicone pieces that bend and move with the curves of your own arm.
This tutorial uses our Link Tears of the Kingdom Zonai Arm kit. If you already have it, you can jump to the gluing guide by clicking here, if you don't have it yet, let's explore the kit!
Link's Tears of the Kingdom Arm Cosplay Accessory Kit
The Zonai Arm kit consists of pieces cast in silicone so that it is flexible and can be adhered to a glove sewn with fabric we provide, or a glove of your own! There's quite a bit to say about this kit, so here's a list of what it includes:
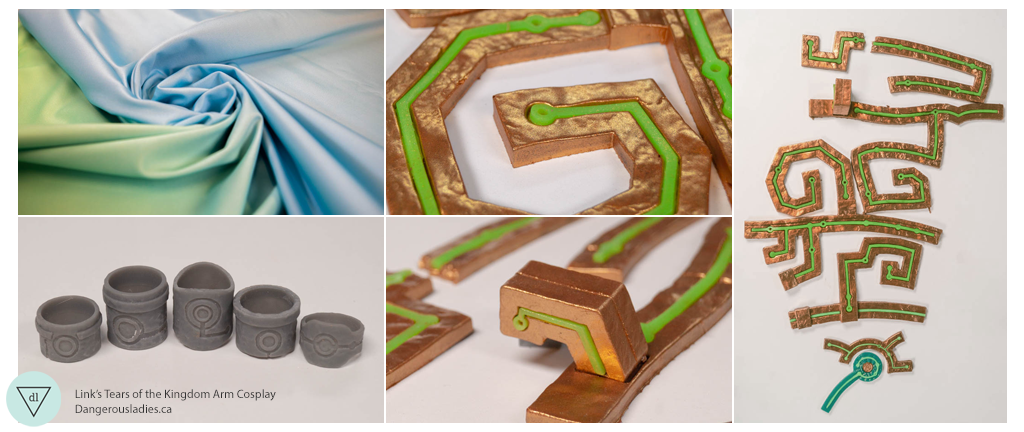
- Gold pieces Gold pieces made from silicone, specifically Dragon Skin
- Green "glowing" stripes which come separate from the gold pieces so you can choose to install them only if you wish! The green is extremely vibrant and glows under UV Light
- Fabric is included if you'd like it, but you have to sew it yourself. If you'd prefer to buy pre-made gloves or use something seamless, we suggest We Love Color's "long matte seamless arm gloves" in the colour of your choice. Many people gradient dye them.
- Rings to call the sages. 3D printed in resin and customized to your ring size.
- If you'd like to paint or weather a silicone cosplay prop, the only paint that sticks to silicone is more pigmented silicone, or a specialty silicone paint like Psycho Paint. It's a platinum silicone, so it is only compatible with other platinum silicones. You CAN put other paints on it, but they will peel off over time and with any stretch or friction, so if you add shadows with something like thinned out acrylics, you may need to periodically retouch it.
Cosplay Tutorial - Gluing Silicone - Link's Zonai Arm from Tears of the Kingdom
When you first receive your kit, you might find that it's "shedding" gold pigment. This is normal! Wipe the pieces down with rubbing alcohol to remove any excess.
Once you have your kit, you're going to want to get your materials together. You don't need much to start:
- Silicone adhesive
- Nitrile gloves (no latex)
- Toothpicks or a disposable brush
- A small plastic disposable receptacle, like a shot glass
- Manicure Scissors (to trim the kit as desired; we do a simple trim to get you started, but if you want a finer edge to each piece you'll find this to be the best tool)
For silicone adhesive, we use Permatex Clear RTV Silicone Adhesive. Fellow Canadians can pick it up at Home Depot for about $10, but it's widely available online and at most hardware stores. Any sort of silicone adhesive will work, just pay attention to the curing time on your bottle! You may also want to use tweezers if you're finding the pieces too small to handle with your fingers.

Gluing the "glow worm stripe" to the base

Adhering silicone to fabric: A Zonai arm that fits you!
- If you're using the fabric we provided, or sewing your own glove, we recommending gluing as much as you can while the fabric is flat. Some pieces you may have to glue partially and sew as you go. It's easiest to glue the pieces on before sewing up the outer seam of the glove
- If you're using a premade glove, you'll want to make sure there's something solid inside the glove so that you're not gluing the glove to itself in the process. The easiest method is to make a body double of your arm so you can work on it with both hands. You can do this with duct tape following Punished Props Academy's Duct Tape Dummy Tutorial.
- If you're finding some of the pieces too large: you can cut the silicone pieces with scissors to trim it down to size, and you can glue the silicone together where cut with the same RTV silicone glue.


