Description
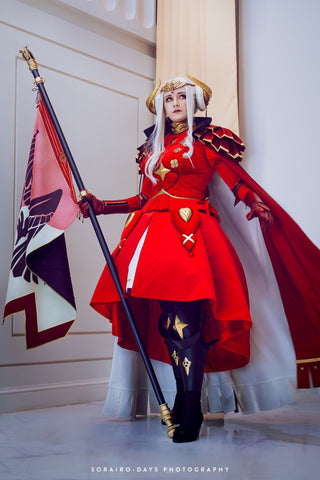
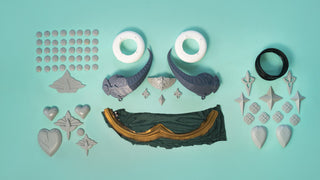
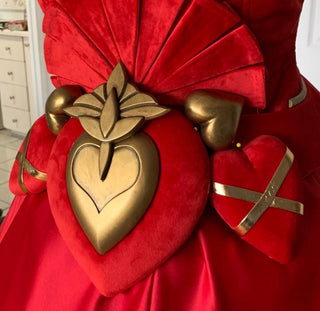
A DIY Kit for Edelgard's Emperor outfit. There are four versions to the kit; a basic accessories kit that includes the gold pieces on the front of her outfit, a cape kit for the bottom of her cape, a headdress version for everything on her head, and a back version that adds everything on her back.
Please note that nothing on Edelgard's back is visible with the cape on. If you don't intend to do the back details, you don't have to get this part of the kit.
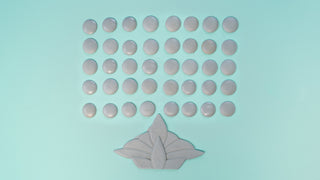
We do a separate "Cape" add-on for the studs and single frond around the bottom of her cape; we understand some people may wish to purchase buttons or make other arrangements instead of dealing with 40+ cast resin pieces.
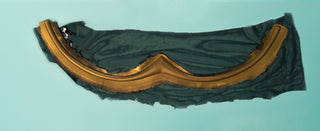
The belt detail is cast in rubber with stretch fabric power mesh backing (for durability). It's soft and flexible so it can bend with your body (no sharp poke from that middle bit!) and you can even handsew it to your belt without difficulty. Cold-cast gold; cannot be painted, but can be rub-n-buff'ed!
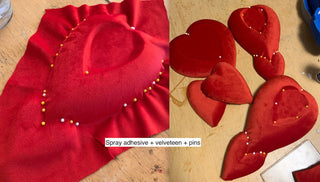
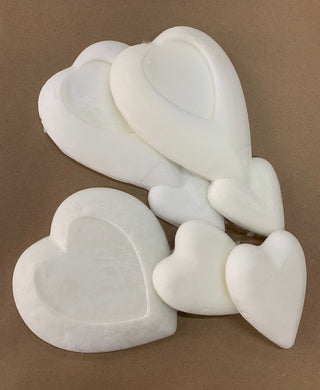
The foam hearts are made to be upholstered in fabric and can be assembled with our standard Emperor Edelgard kit. These are flexible foam so they can bend with you -- they also make cozy pillows for your team.
If you're looking for Edelgard's Hand and Arm armour, we've listed it separately as there are many options! Click here for Edelgard's Hand and Arm Armour Kit.
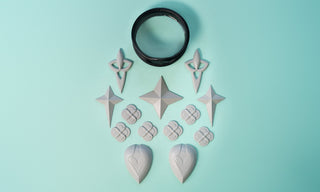
BASIC ACCESSORIES:
- 6x flower buttons
- 1x flexible collar
- 2x star shoulder pieces
- 1x underbust star
- 2x hip hearts
CAPE kit adds:
- 40x cape studs
- 1x frond cape detail
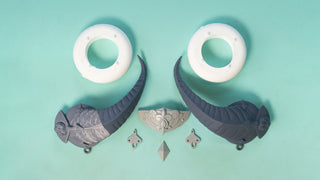
HEADDRESS KIT adds:
- 1x forehead shield
- 2x lower horns (3D printed)
- 2x upper horns (3D printed)
- 2x donut bases
- 2x dangles
- 1x back diamond
BACK KIT adds
- x2 large hearts
- x1 center back heart
- x1 center back frond
- x1 keyhole button
- x1 back of neck frond
ADD-ON BELT DETAIL
- x1 flexible belt
ADD-ON FOAM HEARTS
- 2x front hearts
- 2x medium back hearts
- 1x large back heart
Glue, paints and tools not included. Ships unfinished and may require sanding, filling, and painting. Resin colours may vary by batch. See our FAQ page for details. All orders are made to order and may take 2-3 weeks to produce. Fully finished products may take at least 4 weeks.
Cover model:
Jennifer Rezny of the Dangerous Ladies! (@quicksparrows)
Photo by the incredible, amazing, talented, wonderful Sarah (@sorairo_days)
Looking for a sewing pattern for this costume? Our friends got you covered! Indigo Patterns - Emperor Edelgard Sewing Pattern
Reviews
Finishing Guides

Finishing 3D Prints 101: Basic Supplies for Bodyshopping
This guide is a great follow-along if you've purchased any Dangerous Ladies 3D printed cosplay props. This article is on the basic supplies you'll need for sanding FDM prints, with no...

Quick Finishing Guide - 3D Printed and Resin Kits
Just purchased a kit? Thanks for supporting us! Don't know where to start in assembling your 3D Print or Resin kit? We've got you covered.

